Address
304 North Cardinal
St. Dorchester Center, MA 02124
Work Hours
Monday to Friday: 7AM - 7PM
Weekend: 10AM - 5PM
Address
304 North Cardinal
St. Dorchester Center, MA 02124
Work Hours
Monday to Friday: 7AM - 7PM
Weekend: 10AM - 5PM
Gigabyte ga-h61m-ds2 mainboard does not trigger repair
Motherboard model: Gigabyte ga-h61m-ds2 Rev 3.0
no power on: main board failure
Maintenance process:
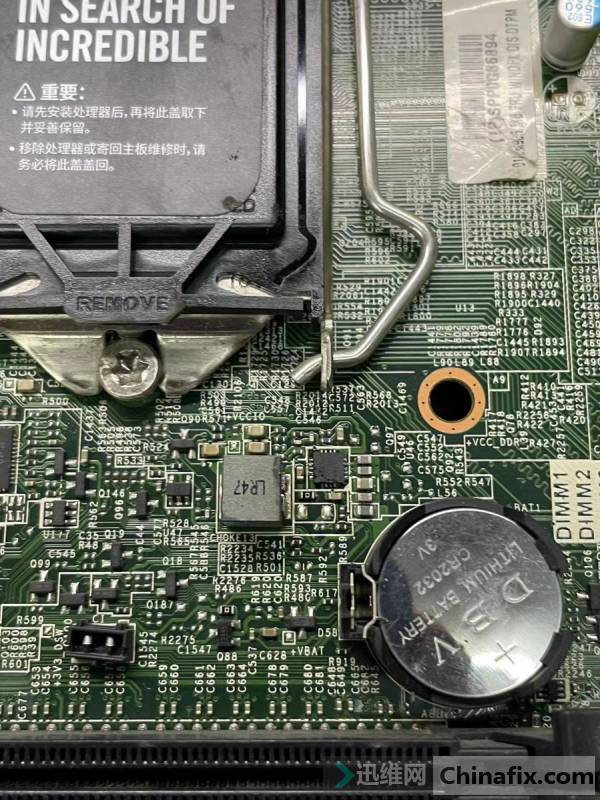
A gigabyte ga-h61m-ds2 motherboard, the fault is the motherboard no power on.
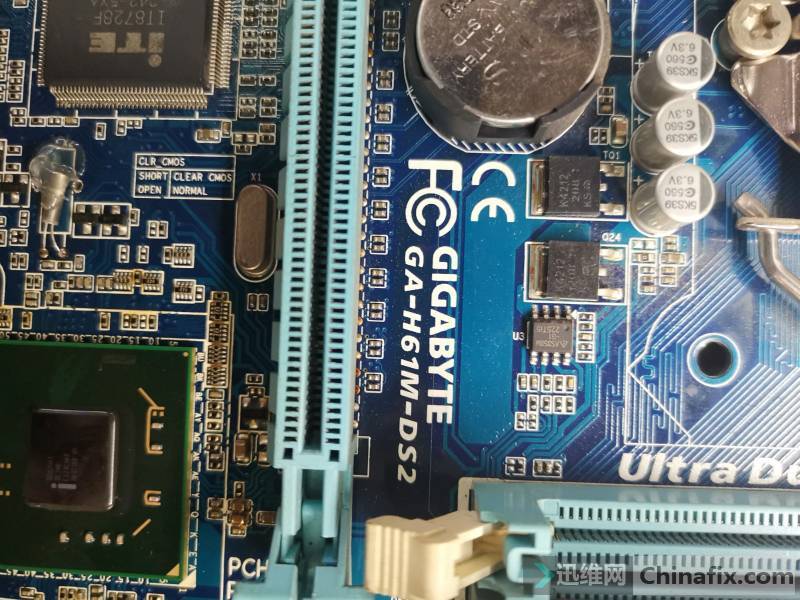
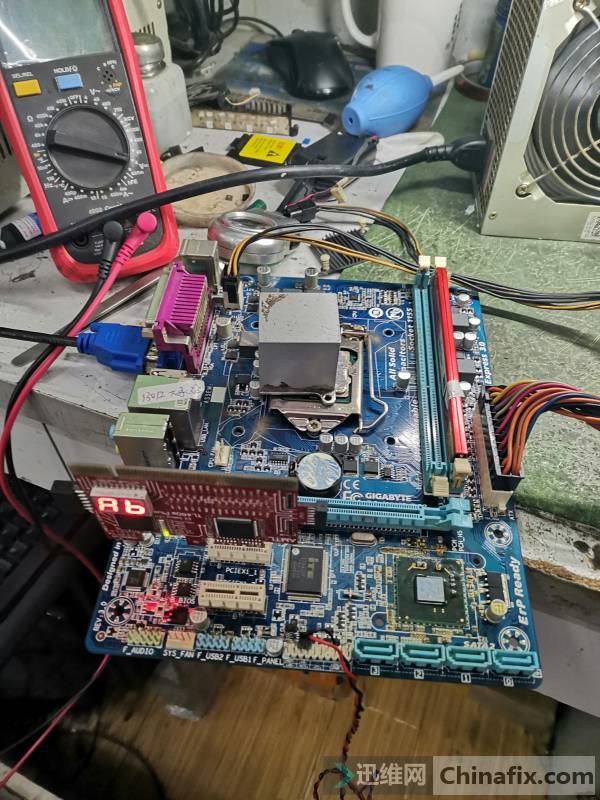
Gigabyte ga-h61m-ds2 mainboard does not trigger repair Figure 1.
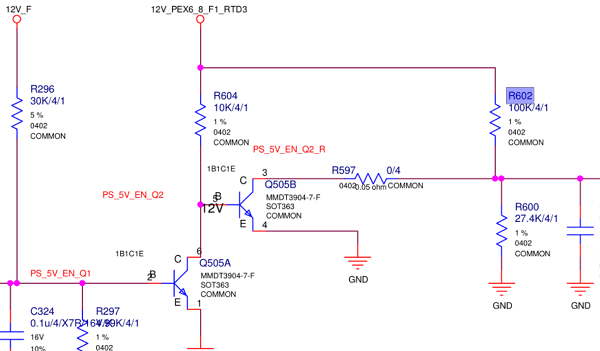
There are no obvious damage, burning and other traces in the appearance inspection of the main board.Plug in the power supply test,no power on, go straight to pin pin of Switch, measure 1.2V, observe a 6 pin tube near the Switch pin, shut down and measure the MOSFET connected with Switch pin, and measure 3.3V after removal.
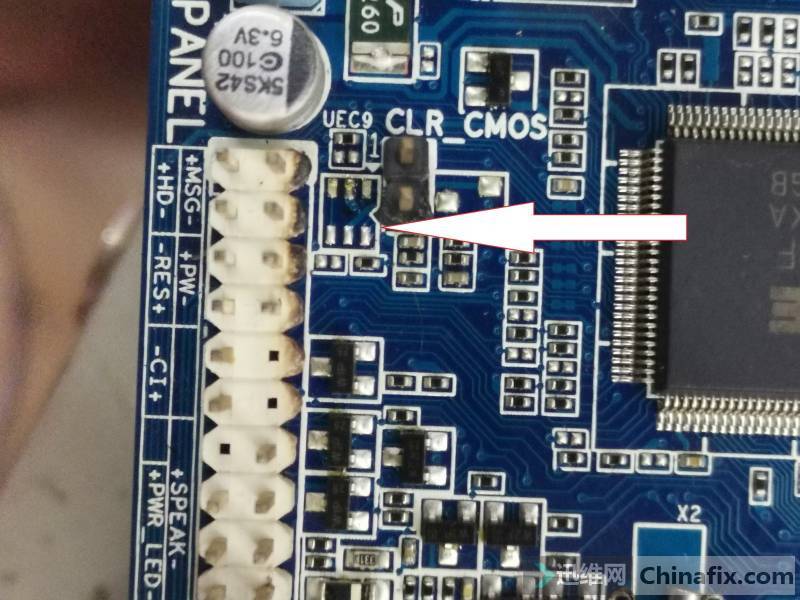
Gigabyte ga-h61m-ds2 mainboard does not trigger repair Figure 2.
Start switch, the motherboard does not stop restart code.
Measure each VCC, memory VCC is normal, bridge VCC is normal, cpuvtt is normal, CPU VCC is not.Check the drawing and search for Du1 CPU,VCC chip, isl95836.
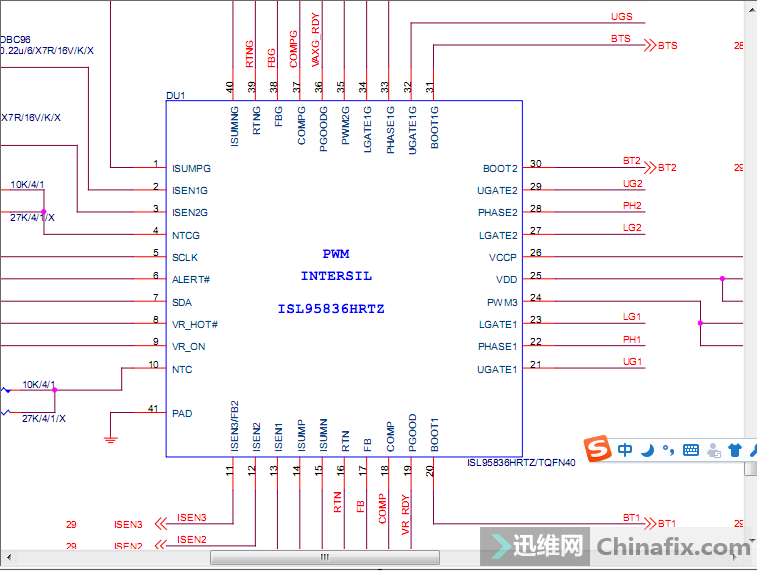
Gigabyte ga-h61m-ds2 mainboard does not trigger repair Figure 3.
Check 25,26 pin VDD vccp, 5V was normal;
Check 9 pin VR_On — vtt-pwrgd is normal;
Check 5,6,7,8 pin 1.05v normal (VTT pull up);
The temperature of 10 pin NTC was normal.
Directly replace the VCC chip, then boot the CPU VCC out, but still restart does not run code.
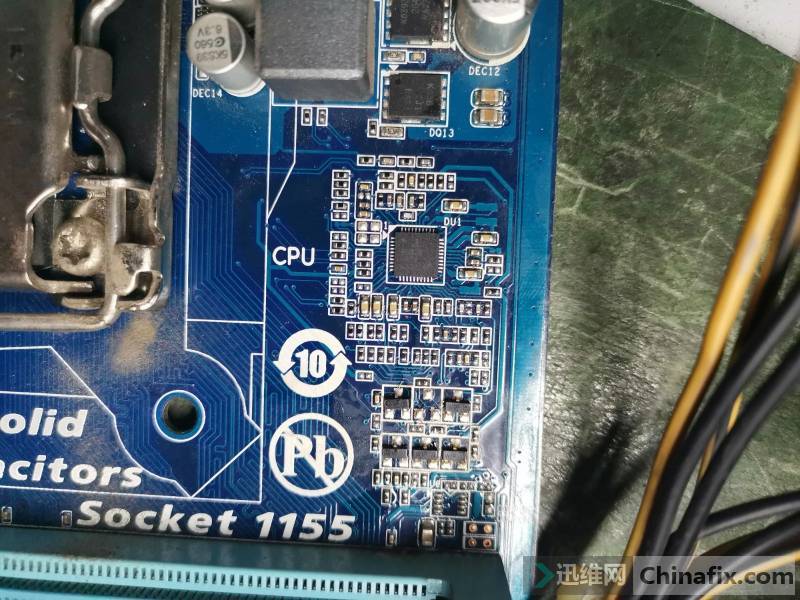
Gigabyte ga-h61m-ds2 mainboard does not trigger repair Figure 4.
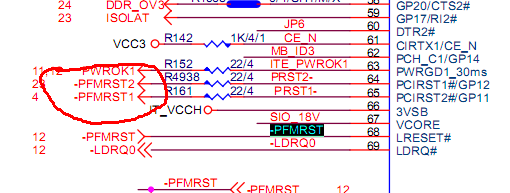
Search pltrst in the drawing, find the plaorm renamed – pfmrst, reset, go to io68 pin and make IO – 65, 64 pin send prst1 -, prst2 – and rename – pfmrst1, – pfmrs2 by resistance, and measure three are normal.
Gigabyte ga-h61m-ds2 mainboard does not trigger repair Figure 5.
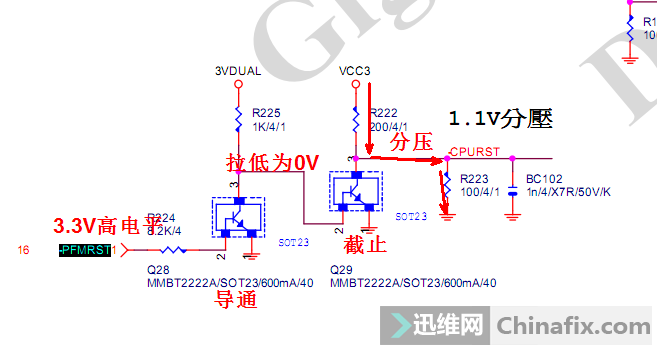
Find the CPU reset cpurst, which is controlled by – pfmrst1 to control Q28 conduction, pull low q29, the 2nd pin makes q29 cut off, vcc3 carries out partial pressure through r222 and r223 to get a 1.1V or so VCC and renamed – cpurst, the measurement is normal.
Gigabyte ga-h61m-ds2 mainboard does not trigger repair Figure 6.
Since they are all normal, the BIOS is still faulty.
Check that the IO VCC, 1 pin is normal, 126 and 127 pin 2.0 are normal, 128 pin 2.8V, 128 pin is obtained by vcc3 partial voltage, but the two partial voltage resistors on the main board are not, the 128 pin is turned on for measurement, and it is found that 2.8V is sent by IO, which is normal temporarily.

Gigabyte ga-h61m-ds2 mainboard does not trigger repair Figure 7.

Gigabyte ga-h61m-ds2 mainboard does not trigger repair Figure 8.
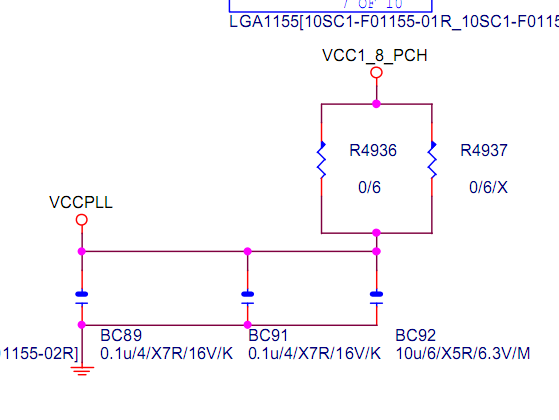
Check PLL VCC 1.8V, normal.
Gigabyte ga-h61m-ds2 mainboard does not trigger repair Figure 9.
Vrmpwrgd, normal.

Gigabyte ga-h61m-ds2 mainboard does not trigger repair Figure 10.
Find the note and open the timing. After the CPU is reset, it will go to the bridge through DMI bus, and the bridge will read BIOS through SPI bus.

Gigabyte ga-h61m-ds2 mainboard does not trigger repair Figure 11.
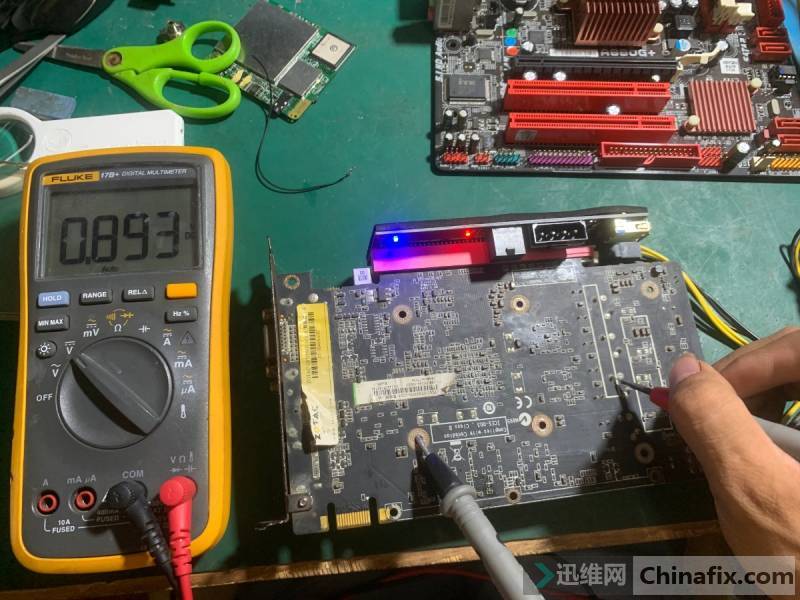
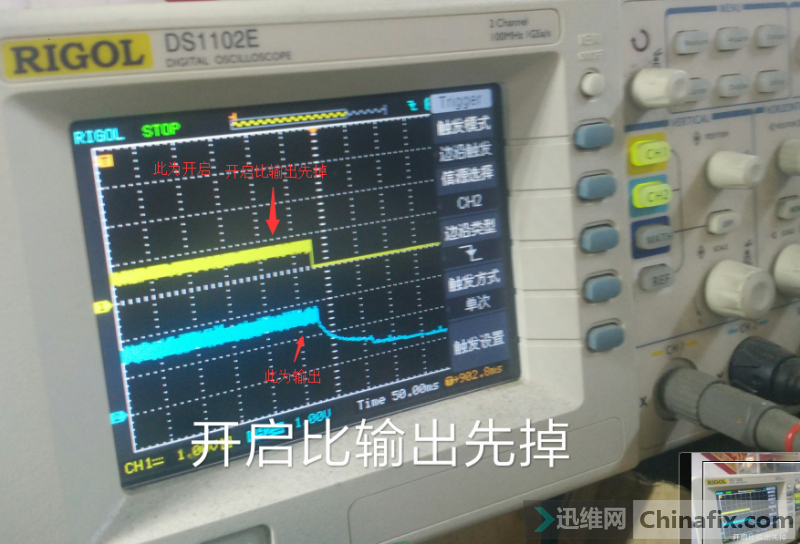
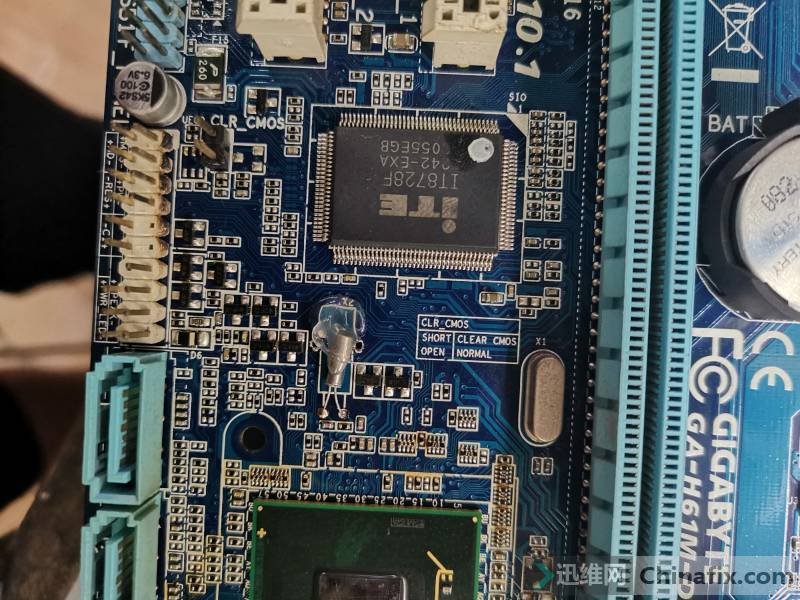
On BGA Rework Station Repeat welding, plug in and start, start running code, the display is also on, but shut down and turn on no power on again.Crystal, no waveform measurement.Replace Crystal directly, turn on everything is normal.
Gigabyte ga-h61m-ds2 mainboard does not trigger repair Figure 12.
Gigabyte ga-h61m-ds2 mainboard does not trigger repair Figure 13.